📸 Uploading images
In this section you will learn how to capture an image and upload it to the system.
You will perform this task after creating the patient, and in every visit afterwards.
Workflow
graph LR
A[Click on <code>Upload photo</code>]
B[Select the patient and upload]
C[Read the instruction]
D[Capture the image]
A --> B --> C --> D
Steps
- Click on
Upload photoon the left sidebar - Select the patient and click on
Upload photo - Select the condition:
hidradenitis suppurativa - Declare the visit ID:
nnn - Read the instructions
- Capture the image with the smartphone camera
- Place the AI Marker in the vicinity of the lesion
- Crop the image, if necessary
- Send the image
Video demonstration
Placing the AI Marker
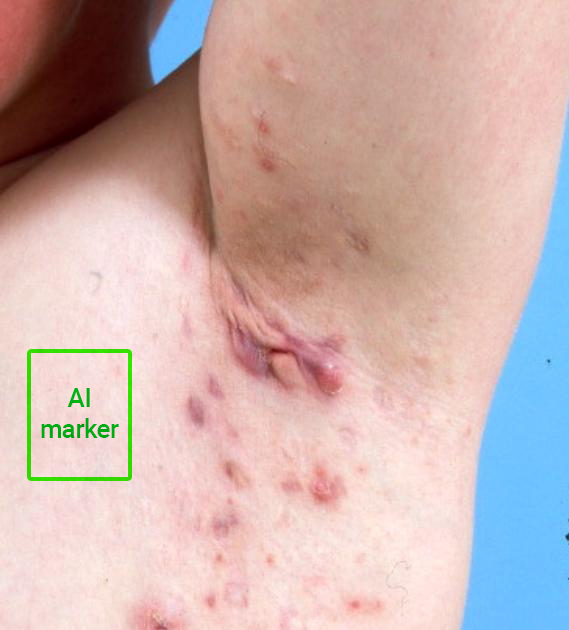
The placing of the AI Marker is somewhat flexible. Each lesion may present different features so there is no universal placement that is mandatory.
Instead, place the AI Marker in the vicinity in the lesion, making sure that:
- The whole AI Marker is captured inside the image
- The AI Marker does not occlude the lesion
The following image may serve as an example: